
BenQ AR17 LED Computer Monitor Light Bar

Package Contents
Check the packaging for the following items. If any is missing or damaged, please contact the place of purchase immediately.
- Screen Bar lamp x 1
- lip x 1
- USB power cable x 1
![]() The illustrations in this guide are for your reference only and may look different from the appearance of the actual product.
The illustrations in this guide are for your reference only and may look different from the appearance of the actual product.
For Your Safety
- Use only the supplied USB power cable and connect only to USB port power (5V DC, 1A). Otherwise the lamp will fail to work normally or result in a fire hazard.
- In order to prevent any damages to the lamp, do not hang or place any objects on the lamp.
- Route the USB power cable so as to avoid it from being pinched by items placed upon it or against it.
- If the lamp will not be used for a long period of time, unplug it from the USB port.
- The light source contained in this luminaire can’t be replaced.
![]() CAUTION
CAUTION
- In case of the following situations, unplug the lamp from the USB port immediately and contact the authorized service center or a qualified service person for inspection or repair:
- When the outer casing of the lamp is broken
- When there are strange odors coming from the lamp
- When the LED light source flickers
- When the insulation of the lamp’s wiring is damaged or frayed, and the metal strings inside can be seen
- Do not use the lamp in a humid environment (like in a bathroom or outdoors).Otherwise the components inside may short-circuit and result in accidents.
- This lamp is designed for indoor use only. Do not use it outdoors.
- Never disassemble the lamp or remove any components from it, as doing so may result in accidents and will void the product warranty.
Installation
- As shown in [Figure A], insert the Screen Bar lamp into the clip.
- Rest the clip on top of your monitor [Figures B I, B 2,]. It is recommended that you fit
the clip closely against the monitor frame so there is no visible gap in between [Figure B 3].


 The applicable range of the monitor frame thickness is 1cm – 3cm.
 - Connect the Micro-USB/Type-C connector of the supplied USB power cable to the MicroUSB/Type-C port on the lamp [Figure C I], and the USB connector to the USB port of your computer [Figure C 2]. The lamp will automatically turn ON upon receiving power from the USB port.
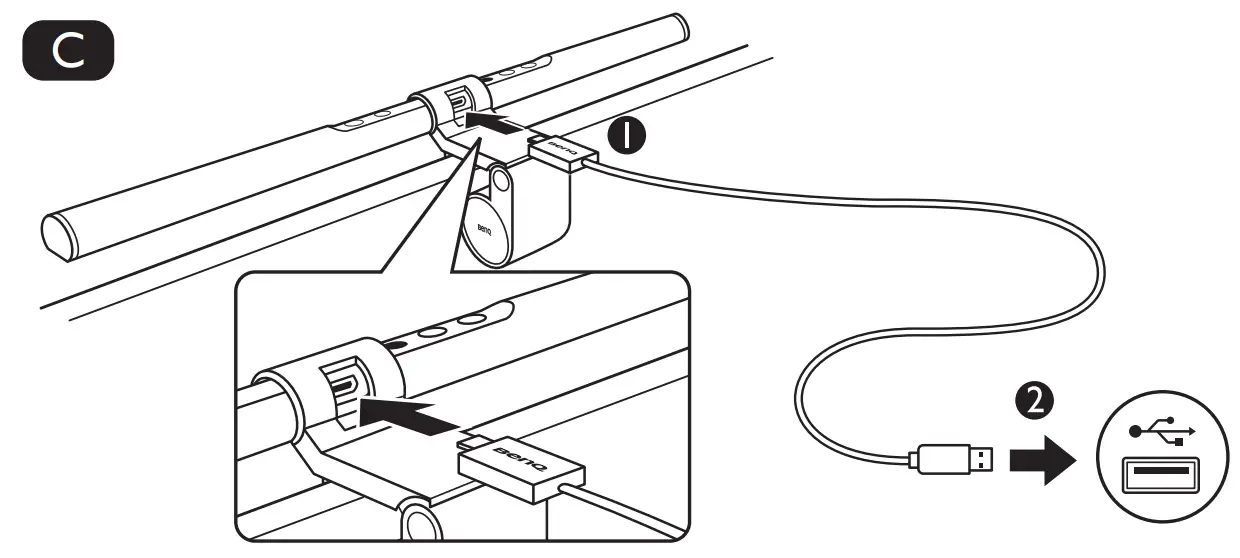
- Do not use a USB extension cable, or a USB cable other than the one supplied. Otherwise the lamp will not function properly.
- It is recommended that the lamp’s power be supplied by the USB port of your computer. If a portable power bank or AC power adapter is to be used as the power source for the lamp, the power output shall meet the requirement (output voltage: 5V, output current: 1A or above) in order for the lamp to function normally.
- If the Auto Dimmer Mode indicator flashes, make sure you are using the USB cable that is provided and no USB extension cable is being used.
Using the Lamp
Turning on/off the Lamp and Entering Auto Dimmer Mode.
Turning on/off the Lamp
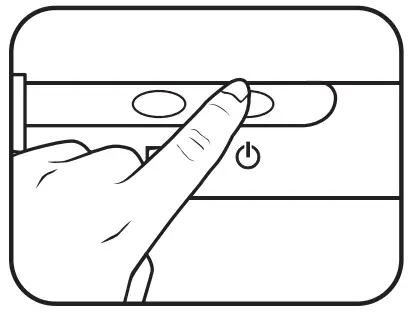
To turn on the lamp, touch the power button ![]() on the lamp. To turn off the lamp, touch the power button
on the lamp. To turn off the lamp, touch the power button ![]() again.
again.
Entering Auto Dimmer Mode
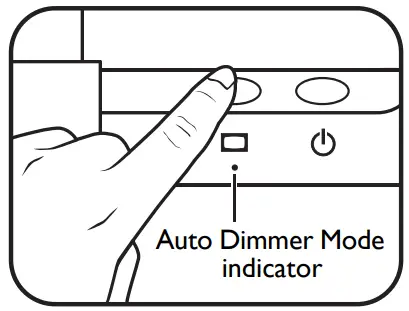
To enter Auto Dimmer Mode, touch the Auto Dimmer Mode button ![]() on the lamp when the lamp is on. The Auto Dimmer Mode indicator will light up. The Auto Dimmer Mode automatically adjusts the lamp’s brightness according to the ambient lighting condition and optimizes the color temperature setting.
on the lamp when the lamp is on. The Auto Dimmer Mode indicator will light up. The Auto Dimmer Mode automatically adjusts the lamp’s brightness according to the ambient lighting condition and optimizes the color temperature setting.
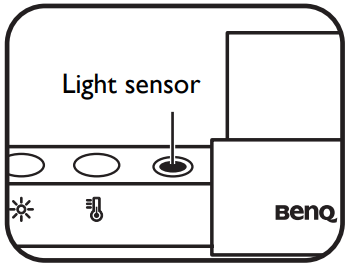
- Do not block the light sensor on the lamp. Otherwise the Auto Dimmer Mode will not function properly.
- If the Auto Dimmer Mode is turned on, the lamp will monitor the ambient lighting condition and dynamically adjust the brightness and color temperature settings.
- The Auto Dimmer Mode will exit automatically and the Auto Dimmer Mode indicator will go off when you manually adjust brightness or color temperature.
- In circumstances where static electricity is strong, the lamp will enter the Auto Dimmer Mode automatically as a safety measure.
Manually Adjusting Brightness and Color Temperature
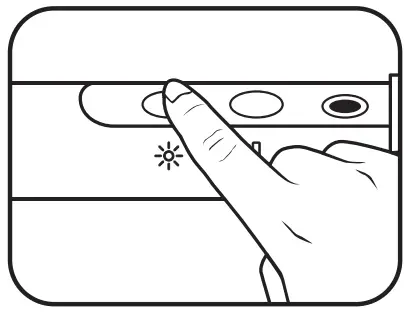
Adjusting Brightness
- When the lamp is on, touch the brightness adjustment button
 on the lamp. The brightness will change each time you touch the button. You can select from 15 brightness levels.
 - You can also adjust brightness by touching and holding the brightness adjustment button . The lamp’s brightness will change gradually and when it reaches your desired level, release the button.
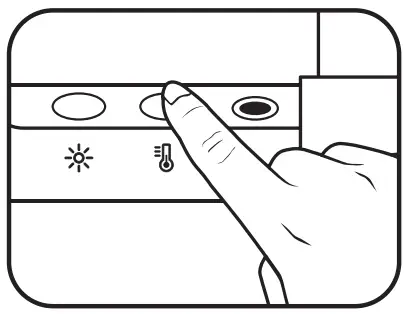
Adjusting Color Temperature
- When the lamp is on, touch the color temperature adjustment button
 on the lamp. The color temperature will change each time you touch the button. You can select from 8 color temperature settings: 6500K (daylight), 5700K (cool white), 5000K, 4500K (neutral white), 4000K, 3500K (warm white), 3000K and 2700K (soft white).
 - You can also adjust color temperature by touching and holding the color temperature adjustment button . The lamp’s color temperature will change gradually and when it reaches your desired setting, release the button.
- The brightness and color temperature settings will be memorized automatically.
- If power supply to the lamp is interrupted unexpectedly, the lamp will resume the last used brightness and color temperature settings upon the recovery of power supply.
Maintenance and Troubleshooting
- Turn off the lamp first, and unplug the lamp from the USB port. Wipe any smears or dusts off the lamp’s outer casing using a soft, lint-free cloth lightly moistened with a mild detergent solvent. Do not use alcohol or any other chemical solvents like kerosene, naphtha and so on, as the lamp’s casing may become damaged.
- Do not rinse the lamp or any of its components directly with water.
- If the lamp does not turn on, check to make sure that there are no loose connections between the USB cable and USB ports.
- If the problem persists, please contact the original place of purchase for help.
Specifications
| Model | AR17 |
| DC power input | 5V, 1A |
| Dimensions | 450 x 90 x 92 mm (Width x Depth x Height) |
WEEE
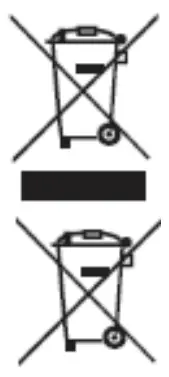 Disposal of Waste Electrical and Electronic Equipment and/or Battery by users in private households in the European Union.
This symbol on the product or on the packaging indicates that this can not be disposed of as household waste. You must dispose of your waste equipment and/or battery by handling it over to the applicable take-back scheme for the recycling of electrical and electronic equipment and/or battery. For more information about recycling of this equipment and/or battery, please contact your city office, the shop where you purchased the equipment or your household waste disposal service. The recycling of materials will help to conserve natural resources and ensure that it is recycled in a manner that protects human health and environment.
Recycling information: See https://www.benq.com/en-us/support/recycling/global-recycle.html for details.
CE DOC
DECLARATION OF CONFORMITY
The device complies with the requirements set out in the Council Directives on the Approximation of the Laws of the Member States relating Electromagnetic Compatibility (2004/108/EC) and Low Voltage Directive (2006/95/EC) and Radio and Telecommunications Terminal Equipment Directive (1999/5/EC), the Restriction of The Use of Certain Hazardous Substances in Electrical And Electronic Equipment Directive (2011/65/EU), Turkish EEE Directive; Turkish ErP (Decision 2010/643);the Commission Regulation (EC) No 1275/2008 implementing Directive 2005/32/EC of the European Parliament and of the Council with regard to eco-design requirements for standby and off mode electric power consumption of electrical and electronic household and office equipment, and the Commission Regulation (EC) No 1194/2012 implementing Directive 2009/125/EC of the European parliament and of the council establishing a framework for the setting of eco-design requirements for energy-related products.
FCC statement
Federal Communication Commission Interference Statement
This equipment has been tested and found to comply with the limits for a Class B digital device, pursuant to Part 15 of the FCC Rules. These limits are designed to provide reasonable protection against harmful interference in a residential installation. This equipment generates, uses and can radiate radio frequency energy and, if not installed and used in accordance with the instructions, may cause harmful interference to radio communications. However, there is no guarantee that interference will not occur in a particular installation. If this equipment does cause harmful interference to radio or television reception, which can be determined by turning the equipment off and on, the user is encouraged to try to correct the interference by one of the following measures:
- Reorient or relocate the receiving antenna.
- Increase the separation between the equipment and receiver.
- Connect the equipment into an outlet on a circuit different from that to which the receiver is connected.
- Consult the dealer or an experienced radio/TV technician for help.
This device complies with Part 15 of the FCC Rules. Operation is subject to the following two conditions: (1) This device may not cause harmful interference, and (2) this device must accept any interference received, including interference that may cause undesired operation.
FCC Caution: Any changes or modifications not expressly approved by the party responsible for compliance could void the user’s authority to operate this equipment.
Customer Support
© 2021 BenQ Corporation.
All rights reserved. Rights of modification reserved.

Documents / Resources
 |
BenQ AR17 LED Computer Monitor Light Bar [pdf] User Guide AR17 LED Computer Monitor Light Bar, AR17, LED Computer Monitor Light Bar, Computer Monitor Light Bar, Monitor Light Bar, Light Bar, Bar |


